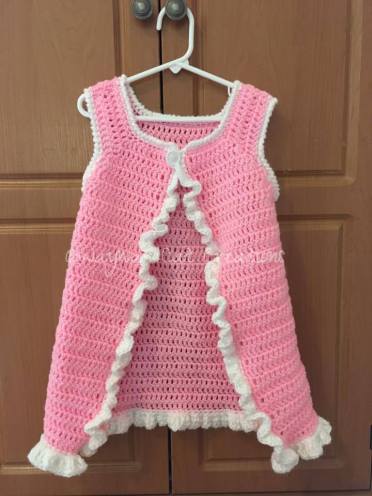
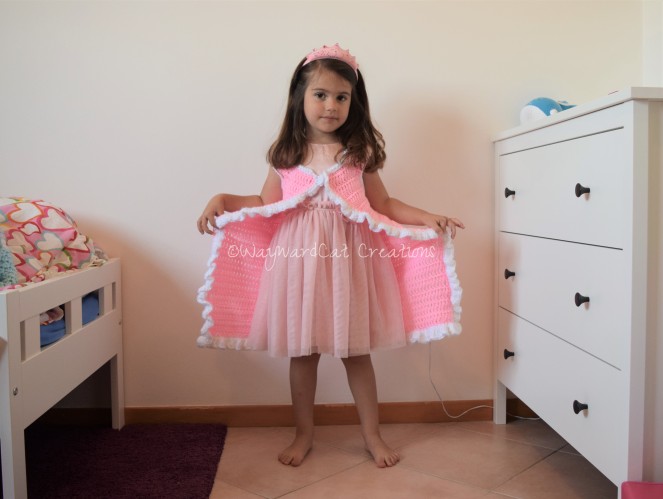
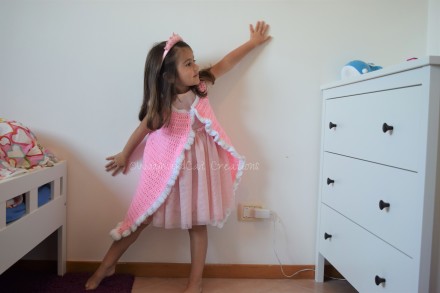
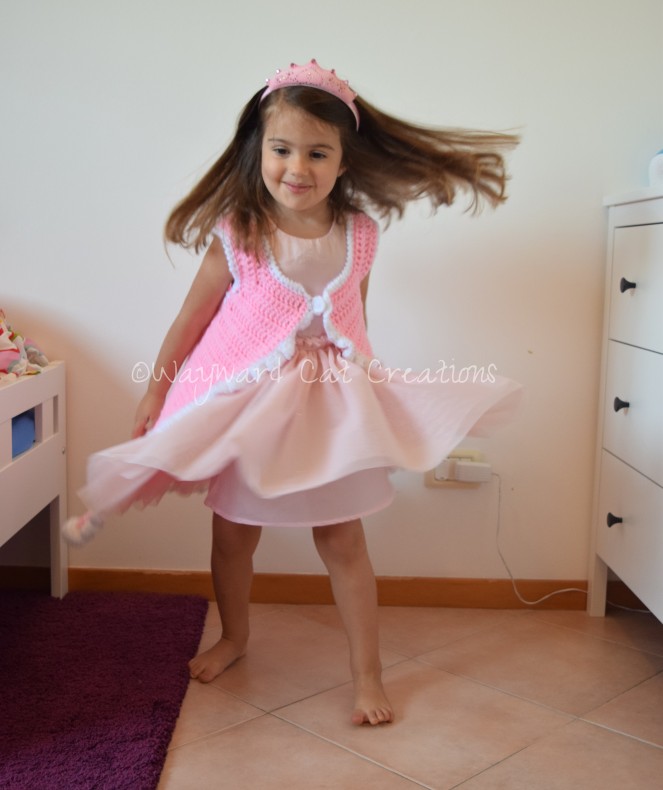
Ok that name is a mouthful, but I am not the best at naming things. Despite the name this robe is adorable! I made it for a spunky little girl who has basically become an extra spawn of mine. Shes sweet, shes sassy, and she knows it! However it is a birthday present for her so I had my daughter model it for me. She is super excited about it, can you tell?
This robe is really an awesome addition to any kiddos dress up box! The color combos are endless, and could even work well as a kingly robe for the little guys. Or they can be like my son and stick with the pink 😉 The pattern is written for a size 4-5 toddler. I have included my gauge if you’d like to do all that fancy math to size down or up, but I am sure it could be resized as simply as changing your hook up or down. Here we go!
pattern is written in U.S English terms
Materials used:
- RHSS economy in pink
- CSS in white
- 5.5 mm hook
- 6mm hook
- Tapestry needle
- One white 22.5 mm button or larger
Gauge:
8 rows of 12 dc = 4×4”
Stitches and terms used:
MC-main color, CC-contrast color, ch-chain, sc-single crochet, dc-double crochet, sl st- slip stitch, RS- right side, WS- wrong side, reverse single crochet a.k.a “the crab stitch”, mattress stitch
Notes:
This pattern is stitched together from 3 separate panels. Ch1 and ch 2 at beginning of rows do not count as a stitch. Main pieces worked with 5.5mm hook, while the border is worked with 6mm
Collar
Row 1: With MC and 5.5mm hook, ch 35, sc in 2nd ch from hook, sc in each st across, turn (34)
Row 2: Ch 2, dc in the next 8 st, 3 dc in the next st, 16 dc, 3dc in the next, 8 dc, turn (38)
Row 3: Ch 2, dc in the next 9 st, 3 dc in the next st, 18 dc, 3 dc in the next, 9 dc, turn (42)
Row 4: Ch2, dc in the next 10 st, 3 dc in the next st, 20 dc, 3 dc in the next st, 10 dc, fasten off
Back Panel
Row 1: With RS of collar facing up, join with a standing double crochet (great tutorial for this stitch over at moogly blog ) at the first dc of the 3 dc cluster. 3 dc in the next st, 22 dc, 3 dc in the next st, 1 dc, turn (30)
Row 2: Ch 2, dc across, turn (30)
Row 3: Ch 2, dc in the next 2 st, 3 dc in the next st, 24 dc, 3 dc in the next st, 2 dc, turn (34)
Row 4: Ch 2, dc across, turn (34)
Row 5: Ch 2, dc in the next 3 st, 3 dc in the next st, 26 dc, 3 dc in the next st, 3 dc, turn (38)
Row 6: Ch 2, dc across, turn (38)
Row 7 – 30: Repeat row 6, fasten off
Front Panel (make 2)
Row 1: With MC, ch 18, sc in 2nd ch from hook, sc in each st across, turn (17)
Row 2: Ch 2, dc in the next 8 st, 3 dc in the next st, 8 dc, turn (19)
Row 3: Ch 2, dc in the next 9 st, 3 dc in the next st, 9 dc, turn (21)
Row 4: Ch 2, dc in the next 10 st, 3 dc in the next st, 10 dc, turn (23)
Row 4 ends the front collar.
Row 5: Ch 2, dc in the next 11 st, 3 dc in the next st, 1 dc, turn (15)
Row 6: Ch 2, dc across, turn (15)
Row 7: Ch 2, dc in the next 12 st, 3 dc in the next st, 2 dc (17)
Row 8: Ch 2, dc across, turn (17)
Row 9: Ch2, dc 13, 3 dc in the next st, 3 dc, turn (19)
Rows 10-35: Ch 2, 19 dc across (19)
At this point you will start to assemble the 3 panels. Here is what they should look like.
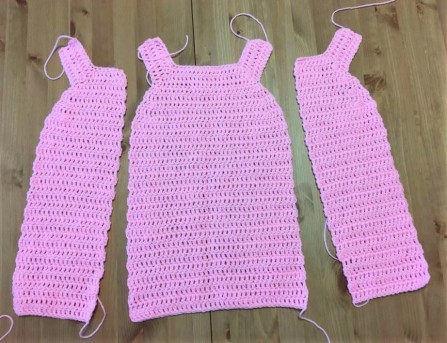
You will need to place your panels like the picture below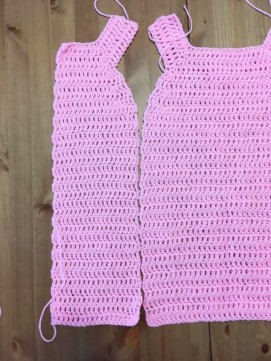 (RS or WS facing, that doesn’t matter until after seaming) and using a mattress stitch, stitch evenly up the sides until you make it to the “armpit” of the two pieces. Go ahead and stitch a few more if you’d like a smaller arm hole. I designed it this way to fit over poofy play dresses!
After seaming the two sides, go ahead and seam up the shoulder straps. This is a good point to clean up any ends that need tucked in.
Ruffle Border and Button Hole
For both arm holes switch to 6mm hook and join in any st with CC and sc evenly around, join to first sc with sl st, do not fasten off/do not turn, ch1, crab st around evenly join and fasten off.
Looking at your seams, decide what is your right and wrong side of the garment. With RS facing up join your CC with a sl st in the upper right corner, 3 sc in same st as join, sc evenly around collar, 3 sc in the upper left corner, sc evenly down the side, 3 sc in bottom corner, sc evenly around the bottom with another 3 sc in the next corner, sc back up to where you started, join with sl st. Do not fasten off and do not turn. Ch1 and crab st around the collar ending on the left side, fasten off.
With robe still facing up (right side facing you) join on the WS with sl st in the 4th sc down from the corner, chain 4, skip 1 st, sl st in next st ch1, turn, 4 sc in chain 4 space, sl st into beginning sl st, do not fasten off.
Start of ruffle edge: continuing from the button hole, 3 sc in each of the next 4 st, 3 hdc in the next 2 at, 3 dc in each st down to the corner, 6 tr in corner st, 3 tr in each stitch around, 6 tr in corner, 3 dc in each st back up the left side leaving 10 st at the end – in those 10 st: 3hdc in 2 st, 3 sc in 3, sc in the last 4, join and fasten off.
Sew button onto left side, making sure it lines up with the button hole.
And there you have it! An adorable and twirly fun accessory for your kiddos dress up stash! I hope you enjoy this pattern and please contact me with any questions you may have and I will get back you to as soon as I can! 🙂 ❤
©WaywardCatCreations2017 All rights reserved. You may create and sell items made from my pattern, but do not copy as your own. Please link back to my pattern when selling online. Thank you!
